“XP-82 Restoration Project”
#44 83887 Twin Mustang Progress Report
Work Progress
 |
| Vertical stabilizer |
Lefthand fuselage with riveted skins |
the left engine mount. (Picture attached) When we get our three lower beams back from Barry and then from heat treating, we will be able to complete the assembly of the mounts.
 |
| Lefthand engine mount |
 |
| Center section flap |
Paul, Bryan, Randall and Tom (the other Tom) have now started skinning the center section flap. (Picture attached)
The local electrical contractor has completed hooking up our rubber press table and our new vertical mill (picture attached) on 2 July to our three phase power grid. We had to purchase two new magnetic starter boxes and a new controller for the press table as we had to convert from 440V to 240V three phase. When you turn on the 25 hp hydraulic pump motor on the rubber table, you think the electrical meter on the outside pole is going to self destruct as the little wheel in there is going around at the speed of light counting kw hours. Fortunately, the motor only runs when one is pressing a part. We have already saved over $1,000 by my milling the joggles in the horizontal stabilizer tee sections and not having to send them out to a local machine shop.
 |
| Our new mill at work |
Peres (Erie) has completed the fourth spar. Thank you, Vic! Thrush Aircraft in Albany repressed a vertical stabilizer leading edge that I had measured wrong. Thank you, Thrush!
I took one wing attach angle to QC Metallurgical in Dania, FL for analysis, and the report shows that it is 24ST aluminum. I asked for the analysis because we have run into a dead end researching the part number of the wing attach angle back to the extrusion number, and then back to the grade of the aluminum, 24ST or 75 T6. During our conversations with Lowell Ford (the plans guru from CA), he confirmed that there was an outboard wing airfoil change on the B and later models. The wing attach angles remained the same shape, but as close as he can remember, the alloy might have changed. He has additional rolls of film that he is sending us that possibly will identify the alloy. If we cannot be sure of the alloy of each and every attach angle, we will need to send the remaining ones to QC for analysis as well. In the meantime, Vic can start duplicating the two angles confirmed as 24ST.
Vic can now start on the duplication of the two angles that we have confirmation of 24ST while we are waiting for the information on the remaining angles.
The test run of the MT Propeller has been pushed back to August 10.
We are still waiting for all of our horizontal to elevator and vertical to rudder hinge points from Nautilus Machine. The delivery holdup is not causing us any delays as of yet as we have lots of other jobs to do. Machine shop delays (really not delays on their part as we have loaded up three shops with an unbelievable amount of work) are the reasons why so many of the sub component parts have not been completed as of yet.
We are making very good progress visually when large components are being skinned, as the looks are deceiving. One cannot imagine how much preliminary work has gone into each structure over the past year(s) just to get them to the point where each can be skinned, thus completing each component, i.e., horizontal, elevator, LH fuselage, aft fuselage extensions, verticals, etc.
 |
| Horizontal stabilizer |
 |
| Allison, Ms. Quality Control |
Katz
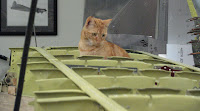
Allison is now on the payroll as our Chief Quality Inspector. Rivet is holding out for more pay.
 |
| Rivet |
“If you don’t mind, would you kindly take your foot off of the pedal!” ... Rivet
It’s July in Jawja (Georgia). Come see your aircraft before it melts!
Thanks!
Tom
P.S. Looking forward to seeing everyone at our get together on 4 September. It will be lots of fun and you will be able to see all of the progress we have made on your aircraft ... up close and in person. Be sure to let us know when you are coming so that we will have a head count for the food, etc.


No comments:
Post a Comment